HOW TO USE OUR FABRIC TEXTURE FLAG APPLIQUES |
|
|
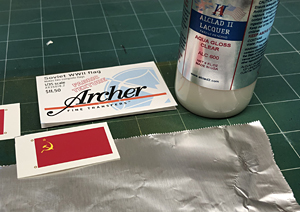
WHAT YOU'LL NEEDAluminum kitchen foil.
|
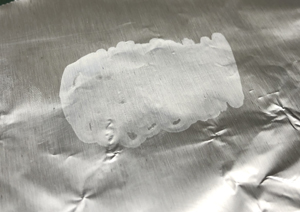 |
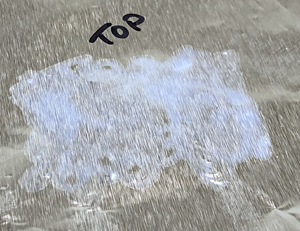
STEP 1Dip flag applique in water and set aside. Apply gloss clear acrylic to the kitchen foil where you intend to apply the flag. |
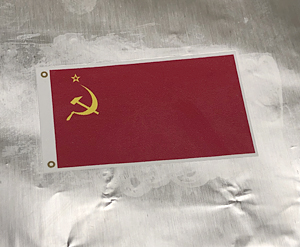 |
STEP 3Remove any excess water from the back of the applique paper. Excess water will dilute the adhesive. Apply the applique as you would any other decal. Be sure there are no air bubbles under the applique and blot up any excess water/acrylic adhesive. Allow to dry until applique cannot be moved. |
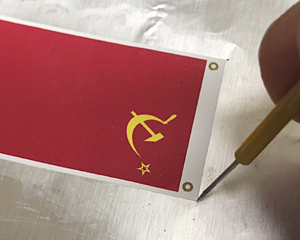 |
STEP 4Use a pin to punch holes through the foil at all four corners of the flag. You will use these holes to align the opposite side flag applique.
|
 |
STEP 5Mark the back side of the foil to insure the reverse side of the flag is in proper orientation. Apply acrylic to where the flag will be placed. |
 |
STEP 6Apply reverse side of flag applique using the pin holes for alignment. Allow to dry thoroughly. We strongly suggest overnight |
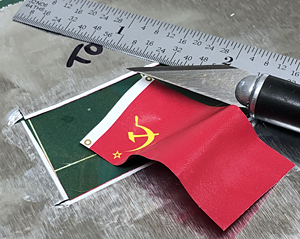 |
STEP 7Using a metal ruler and a sharp hobby knife make several LIGHT passes to cut the flag from the excess foil. NOTE: There is excess white around the flag applique which should be completely cut off. Flag is now ready to be shaped as desired. |
Archer Fine Transfers, AFT Decals, WetMedia Transfer Paper, Surface Details and the Archer logo are Trademarks. All other trade names are the properties of their respective owners and all other logos and business names are assumed to be the property of others. |
|